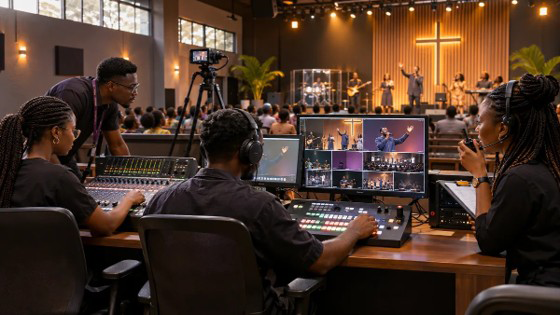
Church media production is the work of making a church service visible, audible and accessible to everyone who needs to experience it. It includes the sound system in the room, the lyrics displayed on screens, the cameras recording the message, the livestream reaching people at home and the content that continues to serve the congregation after Sunday. A clear church production workflow makes it easier to serve consistently, even with limited equipment.
If you are new to church media, all of this can feel overwhelming. There are cables everywhere, software interfaces full of controls and people asking you to solve problems while the service is already in progress. The good news is that a dependable media ministry does not begin with expensive equipment. It begins with clear responsibilities, a well-understood production system and a repeatable workflow.
This church media production guide explains how to build those foundations, whether you serve in a rented hall with two volunteers or a growing church with multiple cameras and a digital mixing console.
Understand the key functions of church media production
A church media team supports the ministry’s message by managing communication and production technology. The congregation should not have to struggle to hear a preacher, follow a song or understand an announcement because of an avoidable technical distraction. Online viewers should be able to hear and see the service without repeatedly adjusting their devices.
There are six principal functions: sound reinforcement, visual presentation, video production, livestreaming, lighting and digital communication. They are closely connected, but they are not interchangeable. Someone who is excellent at editing a sermon clip may not yet understand microphone feedback. A skilled sound engineer may still need training to operate presentation software.
Start by defining the result you want from each department, then decide which person and equipment can deliver it.
| Function | Primary responsibility | Success indicator |
| Audio | Microphones, instruments, loudspeakers and recording feeds | Speech is intelligible and music is balanced |
| Presentation | Lyrics, scripture, announcements and stage displays | Correct, readable content appears at the right time |
| Video | Camera framing, exposure, switching and recording | Stable, coherent footage captures important moments |
| Livestream | Encoding, connection and online monitoring | Stream plays continuously with synchronised sound |
| Lighting | Visibility, mood and camera-friendly exposure | Faces are clear without distracting changes |
| Communications | Content planning, publishing and engagement | Useful, accurate content reaches intended audiences |
Build a church media team around clear roles
A healthy church media team makes every operator accountable for a defined output, while allowing volunteers to develop experience in other roles.
A small church might have one audio volunteer and one person responsible for screens and a static camera. That is a reasonable starting point. However, running audio, switching cameras, correcting lyrics and responding to live chat at the same time creates too many opportunities for errors. Split tasks as soon as the workload justifies it.
The church media team’s production lead owns the service plan and coordinates transitions. The front-of-house engineer manages room sound. A presentation operator runs worship slides and scripture. Camera operators capture assigned shots, and a director or video switcher chooses the live programme feed. An online producer checks stream health and the viewer experience. A communications volunteer handles approved post-service content.
For every role, nominate a backup. Avoid making a single volunteer the only person who knows a password, routing map or project file location. Document the setup, use appropriately controlled accounts and teach someone else how to restore normal operation.
Start with an appropriate level of production
Level 1: Essential. Provide clear speech reinforcement, basic lyrics or scripture, and reliable service photos or a simple recording. Concentrate on training and repeatability.
Level 2: Consistent. Add dedicated recording, a planned online programme, better stage lighting and scheduled social content. Introduce a separate stream audio mix if the room mix does not translate online.
Level 3: Integrated. Use multiple camera angles, separate audience and broadcast graphics, communications channels for production coordination and documented redundancy. Upgrade only when operators can maintain the system without depending on one expert.
Map the church production workflow and signal flow
A documented church production workflow gives everyone a common reference when a signal or service cue fails.
Every device in a church media production system has a job: receive a signal, process it or deliver it somewhere. A microphone captures speech. A mixer combines audio sources. A camera captures video. A switcher chooses a video source. A computer may combine video, graphics and audio for a recording or online stream.
The room audience, online audience and archive often require different versions of the same service. The room might already hear an acoustic drum kit naturally, so the drum microphones may be relatively low in the room mix. Online listeners hear only what the mixer sends them, so the stream may need more drum signal. Presentation screens may show full lyrics while an online feed uses smaller graphics over the camera image.
Map each destination. Mark the actual input and output connections, the expected signal format and the operator responsible. This simple document makes troubleshooting much faster because you can identify where a signal is missing instead of adjusting unrelated settings.
Set up audio before expanding the video system
When planning church media production, prioritise the quality of speech and worship audio before increasing the number of camera angles.
Excellent video cannot compensate for unintelligible speech. Audio is frequently the most important technical improvement a church can make. Position speakers to cover the listening area, select appropriate microphones, establish input gain with headroom and use equalisation to solve audible problems. Learn to distinguish input gain from the fader controlling mix balance.
Use headphones or an independent monitor to check the stream mix. Do not assume that a moving meter or a loud room guarantees that the stream contains good sound. Record a short section of music and speech, then listen back on an ordinary phone.
For the detailed setup process, read our complete church sound engineering guide.
Make screens easy to read and easy to operate
Presentation operators serve people who may be seated at the back of a room or watching from a small mobile display. Large, high-contrast typography, short lyric lines and simple slide layouts are more effective than decorative backgrounds that make words difficult to read.
Create a service playlist containing the planned worship songs, announcements, sermon scriptures and closing content. Verify spellings, song versions and Bible translations before the service. Keep a neutral holding slide, an appropriately licensed background and an emergency blank state ready.
If using ProPresenter, configure crowd-facing and stage-facing outputs independently. Test actual displays rather than trusting the preview alone. See our ProPresenter guide for churches.
Design a reliable camera and livestream workflow
A single stable wide or medium shot is preferable to three poorly operated cameras. Identify the main area of action, then position cameras where they can frame speakers without obstructing sightlines. A second angle can provide a close-up or coverage of worship leaders. Use a common frame rate and compatible output format where practical.
For livestreaming, capture the chosen camera output and a deliberate audio feed in OBS Studio or your supported hardware encoder. Confirm that your internet upload capacity is adequate and stable. Run a private or limited-audience test on the target platform before a public service. Watch the playback on a separate device with sound through headphones.
Use a local recording whenever practical. If internet service fails, the team can still publish an intact sermon later. Where electrical supply is unreliable, a professionally installed backup-power plan for critical devices is important. Never improvise mains wiring, bypass grounding or overload power circuits.
Explore the church livestreaming guide and church video production guide before designing a larger system.
Plan your weekly Sunday service production cycle
The checklist should reflect your actual Sunday service production requirements rather than copy a larger church’s routine.
Reliable Sunday service production begins on Monday, not on Sunday morning. The team needs time to confirm content, identify changes and prepare software and equipment. The following schedule can work for a church with a Sunday service and a weekday rehearsal.
| When | What to do | Owner |
| Monday | Review the previous service; archive recordings; log technical issues | Production lead |
| Tuesday–Wednesday | Confirm service order, songs, announcements and sermon series visuals | Service and presentation leads |
| Thursday–Friday | Prepare playlists, camera plan, stream event and approved graphics | Department operators |
| Saturday/rehearsal | Test signal paths, slides, lighting, audio and recording | Entire production team |
| Sunday before service | Perform a line check, audio soundcheck and presentation/stream test | Department operators |
| During service | Follow cues and monitor actual outputs | All operators |
| After service | Stop outputs deliberately, verify files, back up and report issues | Assigned owners |
Use a run of show
The run of show is a single shared sequence of service events. Include approximate durations, audio and screen cues, camera direction and the names of people responsible. Build in flexibility: a worship leader might extend a song, or the preacher might change the scripture. Provide a clear way to communicate changes without disrupting the service.
For example, the cue ‘Pastor introduction’ may mean fading music down, unmuting the correct microphone, switching to the lectern camera and showing a lower-third graphic. If all operators know that cue, the transition can happen together instead of becoming four independent guesses.
Troubleshoot by following the signal
If an output stops working, first identify the symptom. Is the problem in the room, on the stage monitor, in the livestream or in the recording? Then check the earliest point where that signal should exist and work forwards. Fix one thing at a time.
If a preacher can be heard in the sanctuary but not online, check the stream bus, its assigned output, the receiving audio interface, software meters and the transmitted playback. If nothing is being received at the microphone input, changing OBS settings will not repair it. This habit prevents panic and reduces accidental changes to a functioning system.
For Sunday service production, agree on a safe fallback. If the switcher fails, a static wide camera may be enough. If the slides computer fails, a designated backup computer or printed order can preserve continuity. If recording fails, tell the lead and document the issue rather than claiming that a file is complete.
Train volunteers without overwhelming them
Introduce one role at a time. Begin with the purpose of the role, basic signal flow, the shutdown sequence and the common mistakes that affect that position. Demonstrate the tasks, let the person practise in rehearsal, then allow them to work a service with an experienced operator available.
Have trainees demonstrate competence rather than merely attend a session. Can the presentation operator recover a missing slide? Can the sound volunteer verify a muted channel safely? Can the livestream operator recognise missing audio and switch to the agreed fallback? Keep a short role-specific checklist at each workstation.
Make the culture supportive. Feedback during a service should be concise and focused on fixing the issue. Discuss mistakes afterwards in a debrief. Volunteers develop faster when they can admit what they do not understand without fear of embarrassment.
Protect files, people and access
Use predictable file names such as 2026-11-29_SundayService_Camera01. Keep project files, camera originals, audio recordings, exports and graphics in separate folders. Store at least one additional independent copy of important recordings and verify that it opens. Delete cards only once the authorised copies have been checked.
Communications teams must respect privacy. Establish appropriate consent and filming practices, especially for children, private ministry moments, counselling and sensitive testimonies. Use authorised music, imagery and Bible translations under their applicable licences. Restrict account access to people who need it, enable strong authentication and revoke access when volunteers leave.
Measure the progress of your church media ministry
Judge your church media ministry by how consistently it helps people hear, see and participate in services.
Track recurring problems rather than relying on how impressive a service felt. Useful indicators include the number of preventable technical interruptions, successful recordings, volunteer availability, time required for setup and whether online playback was checked. Ask congregation members and online viewers whether they can understand speech and read slides clearly.
Monthly, select the most consequential recurring problem and assign an owner and deadline. If the same problem occurs three Sundays in a row, the root cause is likely a workflow, training or maintenance problem—not simply the latest person operating the equipment.
A practical first 30 days for a new media director
In the first week, observe the existing service without making major changes. Write down the systems currently used, who operates them and how people communicate. Ask the church leadership which production problems affect ministry most. A short conversation with the worship lead, a preacher and several volunteers often reveals problems that are invisible from behind the console. Create a basic system diagram and identify any unsafe or unreliable equipment that requires professional attention.
During the second week, standardise the essential Sunday tasks. Prepare a shared service order, a functional soundcheck and a presentation readiness check. Give each volunteer one clearly assigned responsibility. If the church already streams, identify the person responsible for checking actual viewer playback. Decide where recordings will be saved and who verifies them after each service.
Use the third week to train backups. Walk through the most common problems at a rehearsal: a disconnected video source, a missing slide, a muted microphone and a failed recording. Let trainees perform recovery steps with supervision. Document the working configuration and store it in a place authorised operators can access. Avoid introducing ambitious changes at the same time as volunteer training; stabilise the existing process first.
In the fourth week, assess the result. Compare the number of incidents, volunteer confidence and completion of service recordings with the previous weeks. Choose the next most consequential improvement and assign an owner. You might find that better labelling, a shared schedule or five minutes of additional soundcheck has a greater immediate impact than a major purchase.
Create a production handover document
Each department’s handover should include the purpose of the system, the names of its devices, a diagram of connections, normal startup and shutdown procedures, the standard service configuration, where essential files are stored, and common fault-recovery steps. Include a contact for issues an operator is not authorised or qualified to resolve. Store account secrets using an approved access-management method rather than placing passwords in a public document.
Refresh the handover when components, routing or service procedures change. Ask a person who did not write it to follow the instructions during rehearsal. If they cannot complete the task, revise the handover. Documentation is useful when it can be followed under ordinary working conditions, not merely when it looks comprehensive.
Frequently asked questions
Can a small church run media production with only two volunteers?
Yes. Prioritise room sound and presentation first. Use a simple camera or local recording if the second operator can manage it reliably. Avoid ambitious live switching until you have capacity for it.
What should a church buy first?
Buy what addresses the biggest current limitation. In many churches that is an appropriate speech microphone, reliable sound reinforcement or necessary cables and stands. Inventory existing equipment first and read the church media equipment guide.
Do we need professional software?
Not necessarily. A reliable free application can be sufficient for many tasks. Choose tools based on your outputs, operating system, computer capability, available training and support.
How often should the media team rehearse?
Rehearse unfamiliar setups and major changes before their first service. Conduct a brief readiness check each Sunday and periodically practise recovery scenarios in a non-live rehearsal.
Conclusion
Successful church media production depends on a team that consistently supports the ministry without making technology the centre of attention. Begin with clear speech, readable screens and dependable service capture. Build documented roles, practise the church production workflow, and expand equipment only when the team is ready. The result is a church media ministry that can grow without sacrificing reliability.